Earth Allies: Microorganisms

Living SoilLiving soil contains billions of living microorganisms that affect soil and plant health. These include bacteria, fungi, protozoa, and nematodes.

A teaspoon of fertile soil can contain up to one billion bacteria. Bacteria help the soil decompose  organic matter, retain nutrients in the soil, compete with disease causing organisms, and break down soil pollutants. Some bacteria help transfer nitrogen into the soil from legumes, improving soil quality.

In our age of sterility and control, bacteria have gotten a bad name, but in truth all healthy ecosystems, including our own bodies, contain much beneficial bacteria. Provide beneficial bacteria with plenty of organic matter and you will have happy worms, dirt, and plants –which means a healthy and bountiful garden.

Woodland FungiFungi, microorganisms that are slightly larger than bacteria, serve a similar function. They help decompose carbon compounds, making the carbon available to plants and soil microbes, and help retain nutrients in the soil. They bind soil particles into aggregates, making the soil more porous to air and water. They provide food for other microorganisms, compete with plant pathogens, and decompose some types of pollution.

Open a rotting log and you can see fungi at work, their long white strands eating away at the decomposing matter. Fungi in the soil, however, are too small to see with the naked eye.

One type of fungus is called mycorrhizae, meaning fungus root. These fungi form a symbiotic relationship with plants roots, improving the roots’ absorption of water, air and nutrients. In turn, the fungi receive sugars from the roots. Good soil containing lots of organic matter, water, air, and microorganisms leads to healthy mycorrhizal growth.

Vegetable RowsProtozoa, another microbial soil ally, primarily eat bacteria, releasing the fertilizing waste product ammonium in the soil and simultaneously stimulating bacteria populations. They also provide a food source for nematodes, an unsegmented worm.

Nematodes are primarily beneficial, though some feed on roots and can kill a plant. Beneficial nematodes feed on protozoa, bacteria and fungi as well as other nematodes, including the harmful varieties. Like protozoa, they also release ammonium into the soil as a byproduct of their feeding. They distribute bacteria and fungi through the soil as they travel through their earthy domain.

Remember that the health of your garden does not solely lie in the hands of our earth allies. You must work just as hard as they do to reap the benefits of a healthy and prospering patch of land.

This Article was Adapted from Sacred Land by Clea Danaan

All Images from Google.com

Gardening with the Moon

It is not only the sun that determines the best time to plant a garden, but also our closest celestial neighbor, the moon. For thousands of years wise men and women have gardened in tune with the moon. Consider the difference in light under a full moon versus when the moon is dark, and how the moon creates Earth’s tides, and you will have an idea of the value of gardening with Luna.

The Moon over a FieldPlants and the human body consist largely of water; though the pull is subtle, we are as affected by the moon’s gravity as the oceans.

Gardening with the moon depends on two rhythms: light and gravity, determined by her journey around Earth.

To plant with the phases of the moon, note if your seeds are short, long, or extra-long germinating. Plant information on the back of seed packs includes how long it will take the seeds to germinate. Short-germinating seeds, like beans and lettuce, will germinate in one to seven days. Long germination means eight to twenty-one days and includes celery and garlic. Some plants take up to twenty-eight days to germinate, known as extra-long germinating seeds.

You want to put seeds in the Earth, or germinate them indoors so that they will germinate near the new moon, when the moon’s earthward pull is strongest. This pull helps the plant establish strong root growth.

The Moon over DandelionsAccording to the biodynamic method of farming, short- and extra-long germinating seeds should be planted from two days before to seven days after the new moon. Long-germinating seeds and seedlings should be planted or transplanted at the full moon and up to seven days after the full. These planting times take advantage of gravitational and magnetic pull of the moon as well as levels of moonlight and give the seeds the optimum situation for their germination.

Other gardening activities can be attuned to the moon as well. At the new moon, prune to encourage growth. During the full moon, harvest herbs used for magic or healing, and pick fruits and vegetables for enhanced flavor. The waning moon is a time of settling and letting go; use this crone time as the moon’s energy settles back into the Earth to harvest root vegetables, weed, and prune to inhibit growth. During the dark of the moon, when lunar energy is deep in the Earth, take time to renew and be still.

This article was adapted from Sacred Land by Clea Danaan

All Images from Google.com

Where to Plant and When

Increase your success in the garden and enhance your own attunement to the natural flow of the seasons by gardening in synchrony with the powers that be; the Sun, the Earth, and the Moon. These bodies determine when and where and how to plant your garden. Plants follow the rhythm of the earth and sun, their life cycle attuned to precisely to the length of the day and the temperature of the soil and air. Like tides, plants also naturally respond to the pull of the moon, as they contain so much water.

Again, keen observation leads to greater gardening success. Throughout the year, spend time outside each day and every evening to notice when and where the sun rises an sets, the shifting of the shadows, the freezing patterns. In spring watch the trees and bushes observing their time of sprouting and bloom. Take the temperature of your soil frequently in the spring or whenever you plan to plant; each plant has a preferred soil temperature for ideal germination.

Learn your last and first average dates of frost, found in the newspaper, online, or by contacting your local plant nursery or extension office. With this information, you will know when to start seeds indoors, when to move transplants into the garden or start seeds outdoors, and where your plants can use extra help like a cold frame (a box with a glass or fiberglass lid that provides protection from frost, snow, and wind during the cooler months).

Notice which parts of your garden might be a separate microclimate, a spot that is different than the prevailing climate. Microclimates might include reflected heat from a stone wall, the shade of a tree, or a cool and wet gully. Soil temperatures and water levels will differ in these areas. Look for warmer spots and reflected light for plants like tomatoes and peppers, and seek dappled light or moister soil for plants that crave cool, like spinach and peas. You can even create your own microclimate by incorporating small ponds to reflect light, building mounds to create areas of shade and sun, or removing and planting shrubs and trees. For a detailed discussion of microclimates, refer to Toby Hemenway’s Gaia’s Garden.

Observing shade, sun, water, and microclimates throughout the year throughput the year will help your garden year-round by allowing you to match plant’s needs to available resources. A greenhouse or a cold frame can further extend your planting and harvesting beyond frost. A simple winter greenhouse can be constructed out of a sturdy frame and plastic sheeting. Place your cold frame or greenhouse in an area that gets lots of winter sunlight and be sure to monitor for overheating or drying out. Plant seeds in your frame in the fall for winter greens and at the end of winter for an early spring harvest.

Due to lack of summer pests and weeds, a cold frame takes very little tending and provides for a splendid winter salad. Just a few of the vegetables suited to a cold frame include root veggies, salad greens, asparagus, parsley, and onions. You can also use your cold frame to get a jump on the warm season by using it as a nursery for plants like tomatoes.

An even easier way to grow cool season crops is with a row cover, a clear plastic or cloth draped over short supports along a row or part of a row. Inverted U-shaped medium-gauge wire, tall enough to clear the crops, makes a simple and inexpensive support. Secure ends of the plastic cover with rocks or by burying an inch or two. During the heat of the day, vent by pulling the edge of your cover back. Row covers and cold frames can be purchased at many garden stores, and even online at www.seedsofchange.com. For more information on winter gardening and a full list of cool-season vegetables, see Eliot Coleman’s Four-Season Harvest.

An even deeper relationship with the land can be explored through your inner knowing. A sacred gardener takes time to listen directly to his or her plants, sensing their individual light, warmth, and gravitational needs. All gardens have their own personality as well as their own microclimates, so listening to the garden itself is key in determining when to plant, harvest, and perform other tasks. Get to know your land’s rhythms and quirks by listening with your whole self.

To feel the rhythm of your land, place your hands on the largest tree in the yard, one on either side of the trunk. Feel into the tree and notice what you feel in your hands. You may also see energy or hear it as a rhythm or tone. You may feel two pulses, the spiral going around the tree sunwise and the spiral going between the earth and the tree.

When you get a sense of these rhythms and any other information, move to another plant. Ask the plants and the garden when to plant, prune, and fertilize. After you have checked in with a scattering of plants, you will have a good idea of when and where it will be best to plant, and the special needs of each plant or area.

This article was adapted from Sacred Land by Clea Danaan

All Images were found on Google.com

Working the Soil

In addition to adding compost and other amendments, a gardener needs to fluff up and aerate the soil to make it more porous for water and air. The conventional way to do this is to till the top few layers of soil, but this practice actually strips the rich topsoil and damages microbial populations.

Instead, double digging or simple aeration of the soil by poking it with a pitchfork maintains the soil’s fertility. Adding mulch on top of the carefully worked soil helps keep moisture in and extreme heat away from plants’ roots.

The first year I begin a plot, I usually choose to double-dig the soil if it has been packed down and ignored for years. This method retains natural, living soil levels while aerating and loosening soil much deeper than conventional tilling. It also raises the soil level, giving you a raised bed with greater surface area than a flat plot.

Raised beds help keep the soil warm –useful in areas prone to mold. They also improve drainage and soil consistency. You end up with happier plants, more planting space, and fewer weeds. In arid climates, you may want to build a wall around your raised bed to conserve water by reducing evaporation and to help keep the soil cool. Depending on how you want your garden to look and the space you have to work with, beds can be any shape, including a traditional rectangle, a spiral, or a keyhole shape, round with a path down the middle for access.

To double-dig, you will need a spade; a wheelbarrow or tarp; compost; manure or peat moss; and a pitchfork. Announce to the land a day in advance that you will be disturbing the soil so that microorganisms and worms can prepare. The living creatures of the soil can hear you and will respond to the energy and intention of what you say. Ask the land if double digging is the best course of action; you may be told that you only need to aerate this area by poking the tines of a pitchfork into the soil, which allows in air and water without disturbing soil layers. If the soil agrees that double-digging is the best course of action, then proceed the following day or whenever the land instructs you to do so.

First, determine where you wish to place your garden space, based on available light and water. A ten-foot-wide bed can be harvested easily from either side, so don’t make your bed any wider than that. At one end of the bed, dig a trench one spade deep, one foot wide and as long as your bed. Put the dirt from this trench into your wheelbarrow or onto the tarp.

With the pitchfork, poke down another foot –or as deeply as possible- into the soil to aerate. Do not turn or otherwise disturb the soil. Dig another trench next to the first and lift the soil into the first trench. You can add compost now into each newly filled trench, or you can add it all as a surface treatment sifted into the newly aerated soil at the end.

Keep digging and turning trenched and poking into the undersoil until you reach the end of your bed, and fill the last trench with the soil from the first. If you have not added compost as you go, now spread compost, manure, peatmoss, and other amendments onto the surface of the soil. Using your pitchfork, sift the amendments into the softened soil. Shape your bed and very loosely pat everything down. Move slowly and deliberately, listening to the essence of the soil as you work.

When you finish, invite the earthworms and other allies back into the soil. Let it sit for a few days or weeks before planting –this is a great activity to do early in the spring when you cannot put in seeds but are anxious to get into the garden, or in the fall if you have begun a new bed space.

The following year, simply aerate your bed with a solid, sharp pitchfork. Poke it into the soil of your garden beds as deep as it will go and gently lean back to loosen the soil without disturbing plant roots or soil layers. Pull the fork out and push it in again a few inches away. Repeat throughout your bed, wherever you wish to plant.

Aerate at the end of the growing season, and again in the spring before you plant. This will help prevent compacting without disturbing the natural balance of the living soil. Worms prefer undisturbed soil (because bacteria prefer undisturbed soil with lots of air and organic matter), so aerating without tilling or digging will make your garden a more attractive home to these powerful allies.

Another method for improving soil fertility and consistency each year is to layer seed-free mulch on the soil and around your plants. Mulch includes any organic matter covering the soil to retain moisture and maintain a steady temperature. Heavy mulching with many layers mimics nature’s way of forming soil and provides soil allies with lots of nutrients. Put mulch around seedlings, add mulch throughout the growing season as needed, and heavily mulch the bed in the fall.

You may decide that double-digging is too much work, and instead create a bed by aerating the soil as described above, then constructing a bed entirely out of piled mulch, layering compost and different kinds of mulch until the bed is at least a foot thick. Between each layer of mulch, include a layer of compost. You can plant right in this mix, adding mulch around the base of plants as the layers settle and decompose; this technique is often referred to as “lasagna gardening” because of the layering process.

Cabbage in RowsThe time it takes to double-dig, aerate, or mulch your garden bed provides a marvelous opportunity for a moving meditation. As you dig, lift, turn, and amend the soil, you get to know its essence more deeply. Open your senses as you work, and sink into present awareness. Stay present to your breath, the smells and sounds around you, the consistency of the dirt, and anything else you notice. You may find that your body remembers an ancient dance with the land cultivated by our ancestors thousands of years ago.

You may begin to hear the song of the land more clearly. A garden prepared with consciousness of our relationship with the earth produces plants with greater life-force energy.

This article was taken from Sacred Land by Clea Danaan

All images were found on Google.com

Additional Soil Amendments

Healthy SoilCompost may be all you need to achieve ideal garden humus, but sometimes additional amendments can meet specific plants’ individual needs. There are many natural fertilizers available that feed the soil instead of feeding the plants as conventional fertilizers do. Healthy soil yields healthy, balanced plants. Natural fertilizers carry the power of their source’s energy and provide complete support for soil and plants.

Studies show that vegetables grown in organically amended soils contain dramatically more nutrients than those from chemically amended land. Conventional fertilizers also tend to contain petroleum products (many fertilizer companies are affiliated with the petroleum industry), so organic fertilizer helps us reduce our use of non-renewable resources.

SproutTo determine which amendments are best for your soil, take a soil test, ask local nurseries or the extension office what they recommend for your area’s soil, or quite simply ask the soil itself. Keep in mind that without a lot of organic matter in the soil via compost or composted manure, plants cannot absorb fertilizers effectively. The soil is not unlike your own body; if you eat well and drink lots of water, your digestive system can absorb supplements better.

Build the soil first and protect it with mulch (any substance that covers the soil while allowing the flow of air and water), then add natural amendments. Vegetable garden soil should be slightly acidic, but it will depend on the plant. Most vegetables prefer a slightly acidic soil with a pH of 6.0 to 6.8; incidentally, the human body prefers a similar pH of close to 7. Flowers’ acid preference can vary greatly (and changing the acidity of the soil can even produce different results in the same plant, like determining the color of the flower); a plant guide can help steer you in the right direction for whatever flowers you wish to grow.

You can make your soil more acidic (lower the pH) by adding composted manure, about 2 cubic feet of manure for each 100 square feet of garden. To raise the pH (or make the garden more alkaline), mix in 5 to 10 pounds of dolomitic lime for each 100 square feet; sandy soil requires less lime while loam and clay need more. Lime can be found in garden centers.

Healthy Soil On a package of fertilizer, you will find a number indicating the ratio of nitrogen (N) to phosphorus (P) to potash or potassium (K). Traditionally only these three are listed, but many of the organic amendments that balance N, P, and K levels also add trace minerals like calcium and iron.

Here are suggestions for giving back missing minerals to the soil, and the plants that need these nutrients in high amounts:

  • Cotton meal, coffee grounds, or alfalfa or green clover planted as a cover crop and worked into the soil, for nitrogen- corn, potatoes, brassicae (cabbage family), cucumbers, leafy greens, and onions need high amounts of nitrogen. Add these amendments regularly, as nitrogen is a key nutrient in the garden.
  • Egg shells, dolomitic lime, or wood ash for calcium- legumes need an extra boost.
  • Kelp meal for potassium, iron, and trace minerals; wood ash, granite dust, and greensand for potassium- brassicae, corn, potatoes, tomatoes, eggplant, and peppers need lots of potassium, and brassicae, leafy greens and the tomato family need plenty of iron. Bone and blood meal also contain iron but are from animals killed in slaughterhouses, so I personally stay away from them. Kelp meal is also a natural fungicide.
  • Limestone (especially lomitic lime) to raise the soil pH and add calcium and magnesium- needed by grains, corn, and the tomato family.

Sacred SoilAdd amendments at the beginning of a season, then let the garden breathe for a few days before planting. To reduce future nutrient imbalance, rotate crops each season. Crop rotation means that one year you might plant corn in a plot, then the next year plant legumes to replace nitrogen, and the following year plant tomatoes.

This assures the soil has a chance to recover from the previous year’s crop. Mix compost and worm castings into the sol periodically throughout the season and before planting a new crop. Add mulch to the soil surface to reduce nutrient runoff.

This article was taken from Sacred Land by Clea Danaan

All images were found on Google.com

Composting Basics

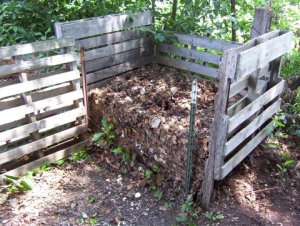
Compost BinCompost epitomizes the creativity and fertility of the Earth, where grass clippings, wood ash, apple cores, and egg shells magically transform into fertile, rich soil. Like soil, compost is a knot of many interconnected relationships, illustrating the infinite creativity of the Earth. The word compost comes from the Latin componere, “to put together.” This “black gold” of waste, water, air, and micro-organisms perform a juicy process that yields fertile soil.

While you can purchase compost from garden centers, making your own saves money and connects you directly with your garden. Creating your own compost not only ensures that you know exactly what goes into your soil- commercial compost is not regulated in many states and can include just about anything, including high-salt manure and weed seeds- it also establishes an immediate relationship between you and your garden as your trees, vegetables, flowers, and lawn benefit directly from your actions.

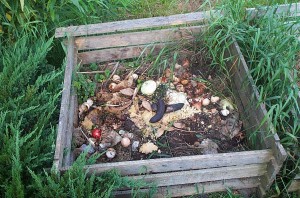
Composted Kitchen WasteSome of your household waste and the waste from your yard directly nourishes your garden, the food that grows there, and your body, soul, and community. Composting reduces our negative impact on the land by keeping kitchen and yard waste out of landfills. By composting, you participate in nature’s laws of cycling and recycling.

Beginning the soil-building process with compost is a crucial first step in building a healthy garden, as compost boosts soil nutrient levels, encourages beneficial bacteria, and improves soil condition. Additional fertilizers cannot be absorbed by plants without help from soil micro-organisms, and soil micro-organisms need lots or organic matter to thrive. By starting with rich compost, you create a habitat where micro-organisms can help plants absorb whatever they need.

Usually compost provides a balance of nitrogen, carbon, calcium, and other nutrients, but you may need to add additional fertilizer for certain crops known as heavy feeder, those plants that require large amounts of certain nutrients. (Compost is not, strictly speaking, a fertilizer. Fertilizers feed plants, while amendments, like compost, feed soil.)

Mature CompostTo make your own compost, you need a bin of at least three cubic feet large that allows for air flow. Old crates, 3/4 inch wire mesh, and other strong but open materials make the best walls for a compost bin. You can also build it out of a clean food- grade 50-gallon drum on a tumbler that you rotate daily; or take an old garbage can, drill holes in the sides for air flow, and bury the bottom a few feet in the ground. You can also simply create a pile in the corner of the garden. Choose a location that is handy to get to from the kitchen and the garden alike, and one that is easily accessible by water. If you have room, build several bins or piles and fill them one at a time.

In your bin or pile, layer grass clippings that have not been treated with chemicals, small amounts of leaf waste, wood ash, soils, herbivore feces, and kitchen scraps. Brown matter like dried grass, leaves, or sawdust provides carbon, while green matter like fresh leaves and kitchen waste provides nitrogen. Manure is, despite its color, a “green” compost material, and it is very high in nitrogen.

You need a balance of carbon, nitrogen, water, and air to create the ideal condition for compost; most garden and kitchen waste is too high in carbon to decay rapidly, so adding a source of nitrogen like manure will help speed up the composting process. If you don;t live near and farms or horse stables, manure and other nitrogen-rich amendments can be purchased at garden centers prebagged or in bulk.

A Compost HeapMake sure your pile stays moist, about as wet as a rung out sponge. Turn it periodically to aerate and mix the ingredients. If you have a problem with neighborhood animals like dogs or raccoons, make sure you have a door and a solid latch on your bin to keep them out.

I do not add citrus or onions to my compost, for they tend to slow the decay process or simply decay more slowly than the rest of the pile, but if your pile generates enough heat and has just the right conditions, this will matter less. Do not add dog or cat feces, they can contain disease bacteria. Do not add butter, other oils, or meat, all of which can rot anaerobically and attract pests, from salmonella to rats. Do not include diseased plants, noxious weeds, invasive vines, or seeds.

If you have a lot of resinous matter like pine needles, use them to mulch around acid-loving plants like strawberries rather than include it in the compost, as it will slow or halt the decay. Same with cedar shavings; use these as mulch only where you don’t want other plants to grow, and never put them in your compost.

This article is an excerpt from Sacred Land by Clea Danaan

All Images are from Google.com